The Inspiration
I'm talking about it a bit here and on social media, but it’s worth driving the point home...
If I decided to create the Terrifiknits website in 2024, it was out of commitment.
Because I believe it’s important that we take back some control over the clothes we wear, rather than consuming toxic garments shipped from the other side of the world.
Because I also believe we need to reclaim craftsmanship and relearn what it truly means to create a garment—the time it takes compared to the impulse-driven consumption we’re constantly subjected to.
And because I want all this knowledge and expertise to be available to as many people as possible and to stand the test of time.
Terrifiknits is my way of offering you, for free, the knowledge to create clothing and accessories that reflect who you are—unique, filled with love, and made with quality materials. (Yes, for those who missed the memo, we’re 100% natural fibers here!)
But let’s get to the Tobin hood!
Right now, I’m working hard on creating YouTube tutorials to make knitting even more accessible and to help democratize the craft.
This is the first design I’ve created not for myself, but for you! It’s a pattern that’s been requested a lot, and I truly believe it’s perfect for beginners.
It’s super simple, especially for those trying circular knitting for the first time, and I’ve designed the step-by-step tutorial to be easy to follow while ensuring the final result has that real wow factor!
Alright, enough talking—time to introduce the Tobin hood!
The Pattern
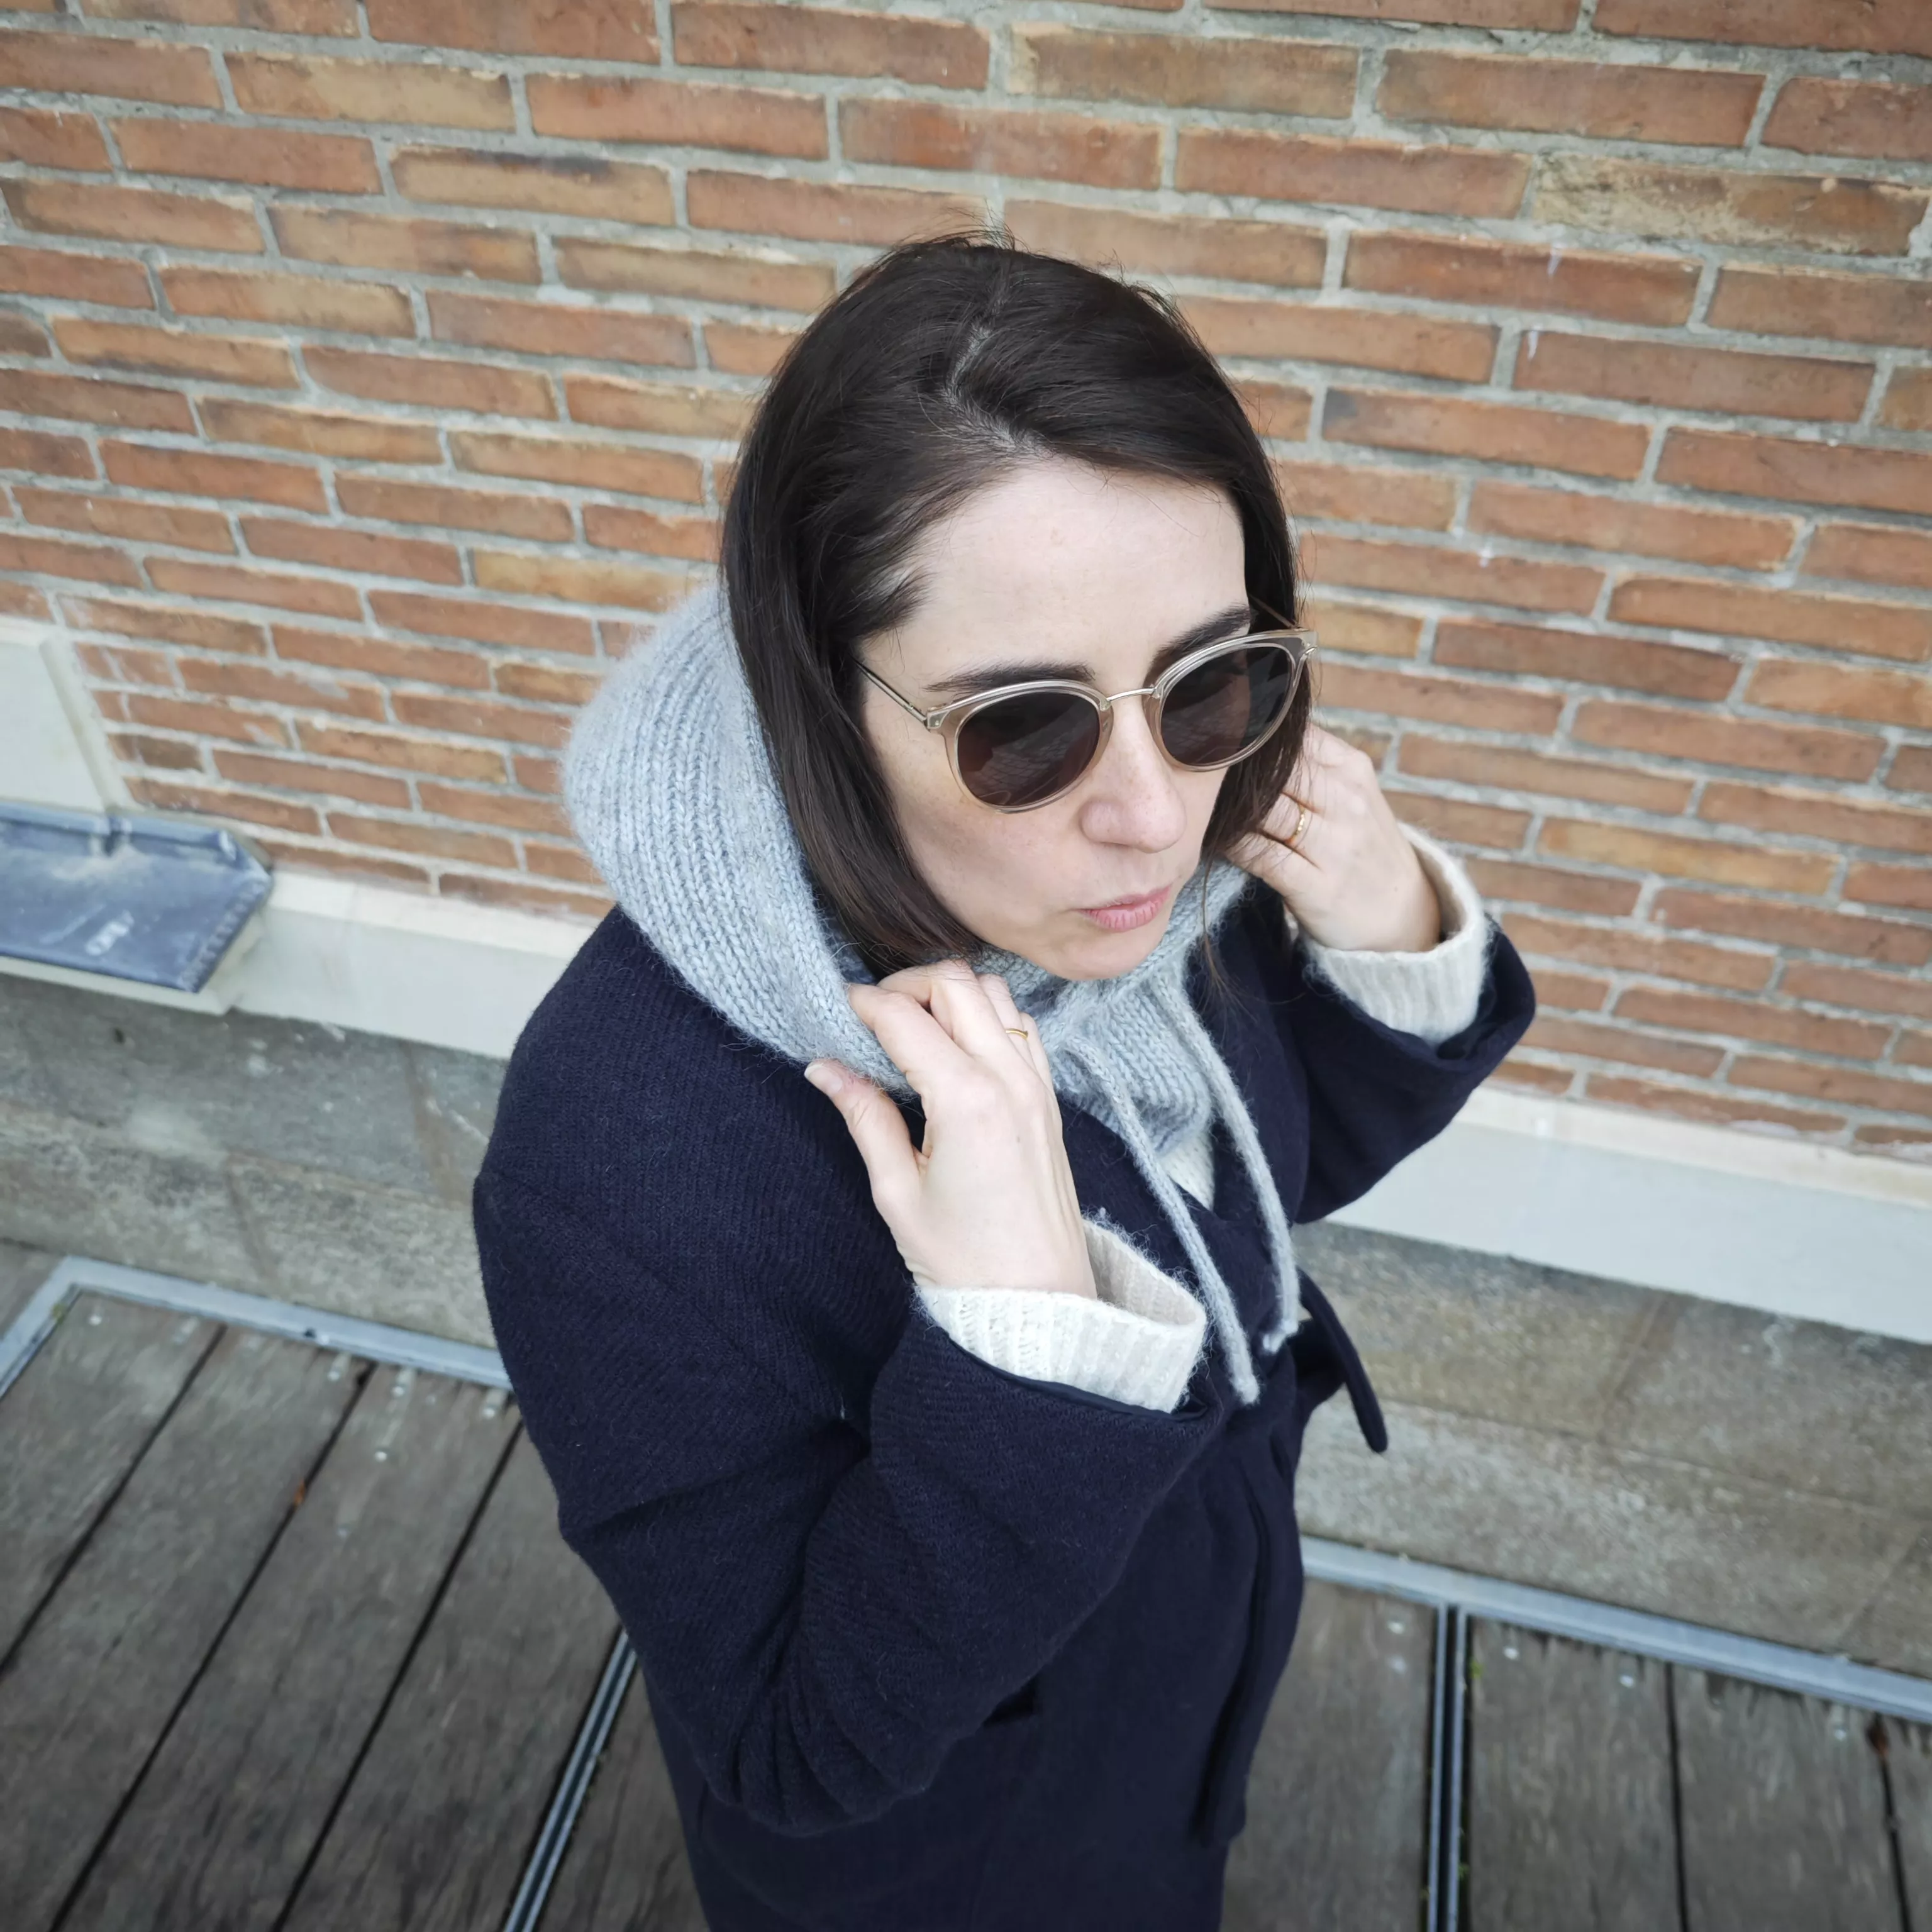
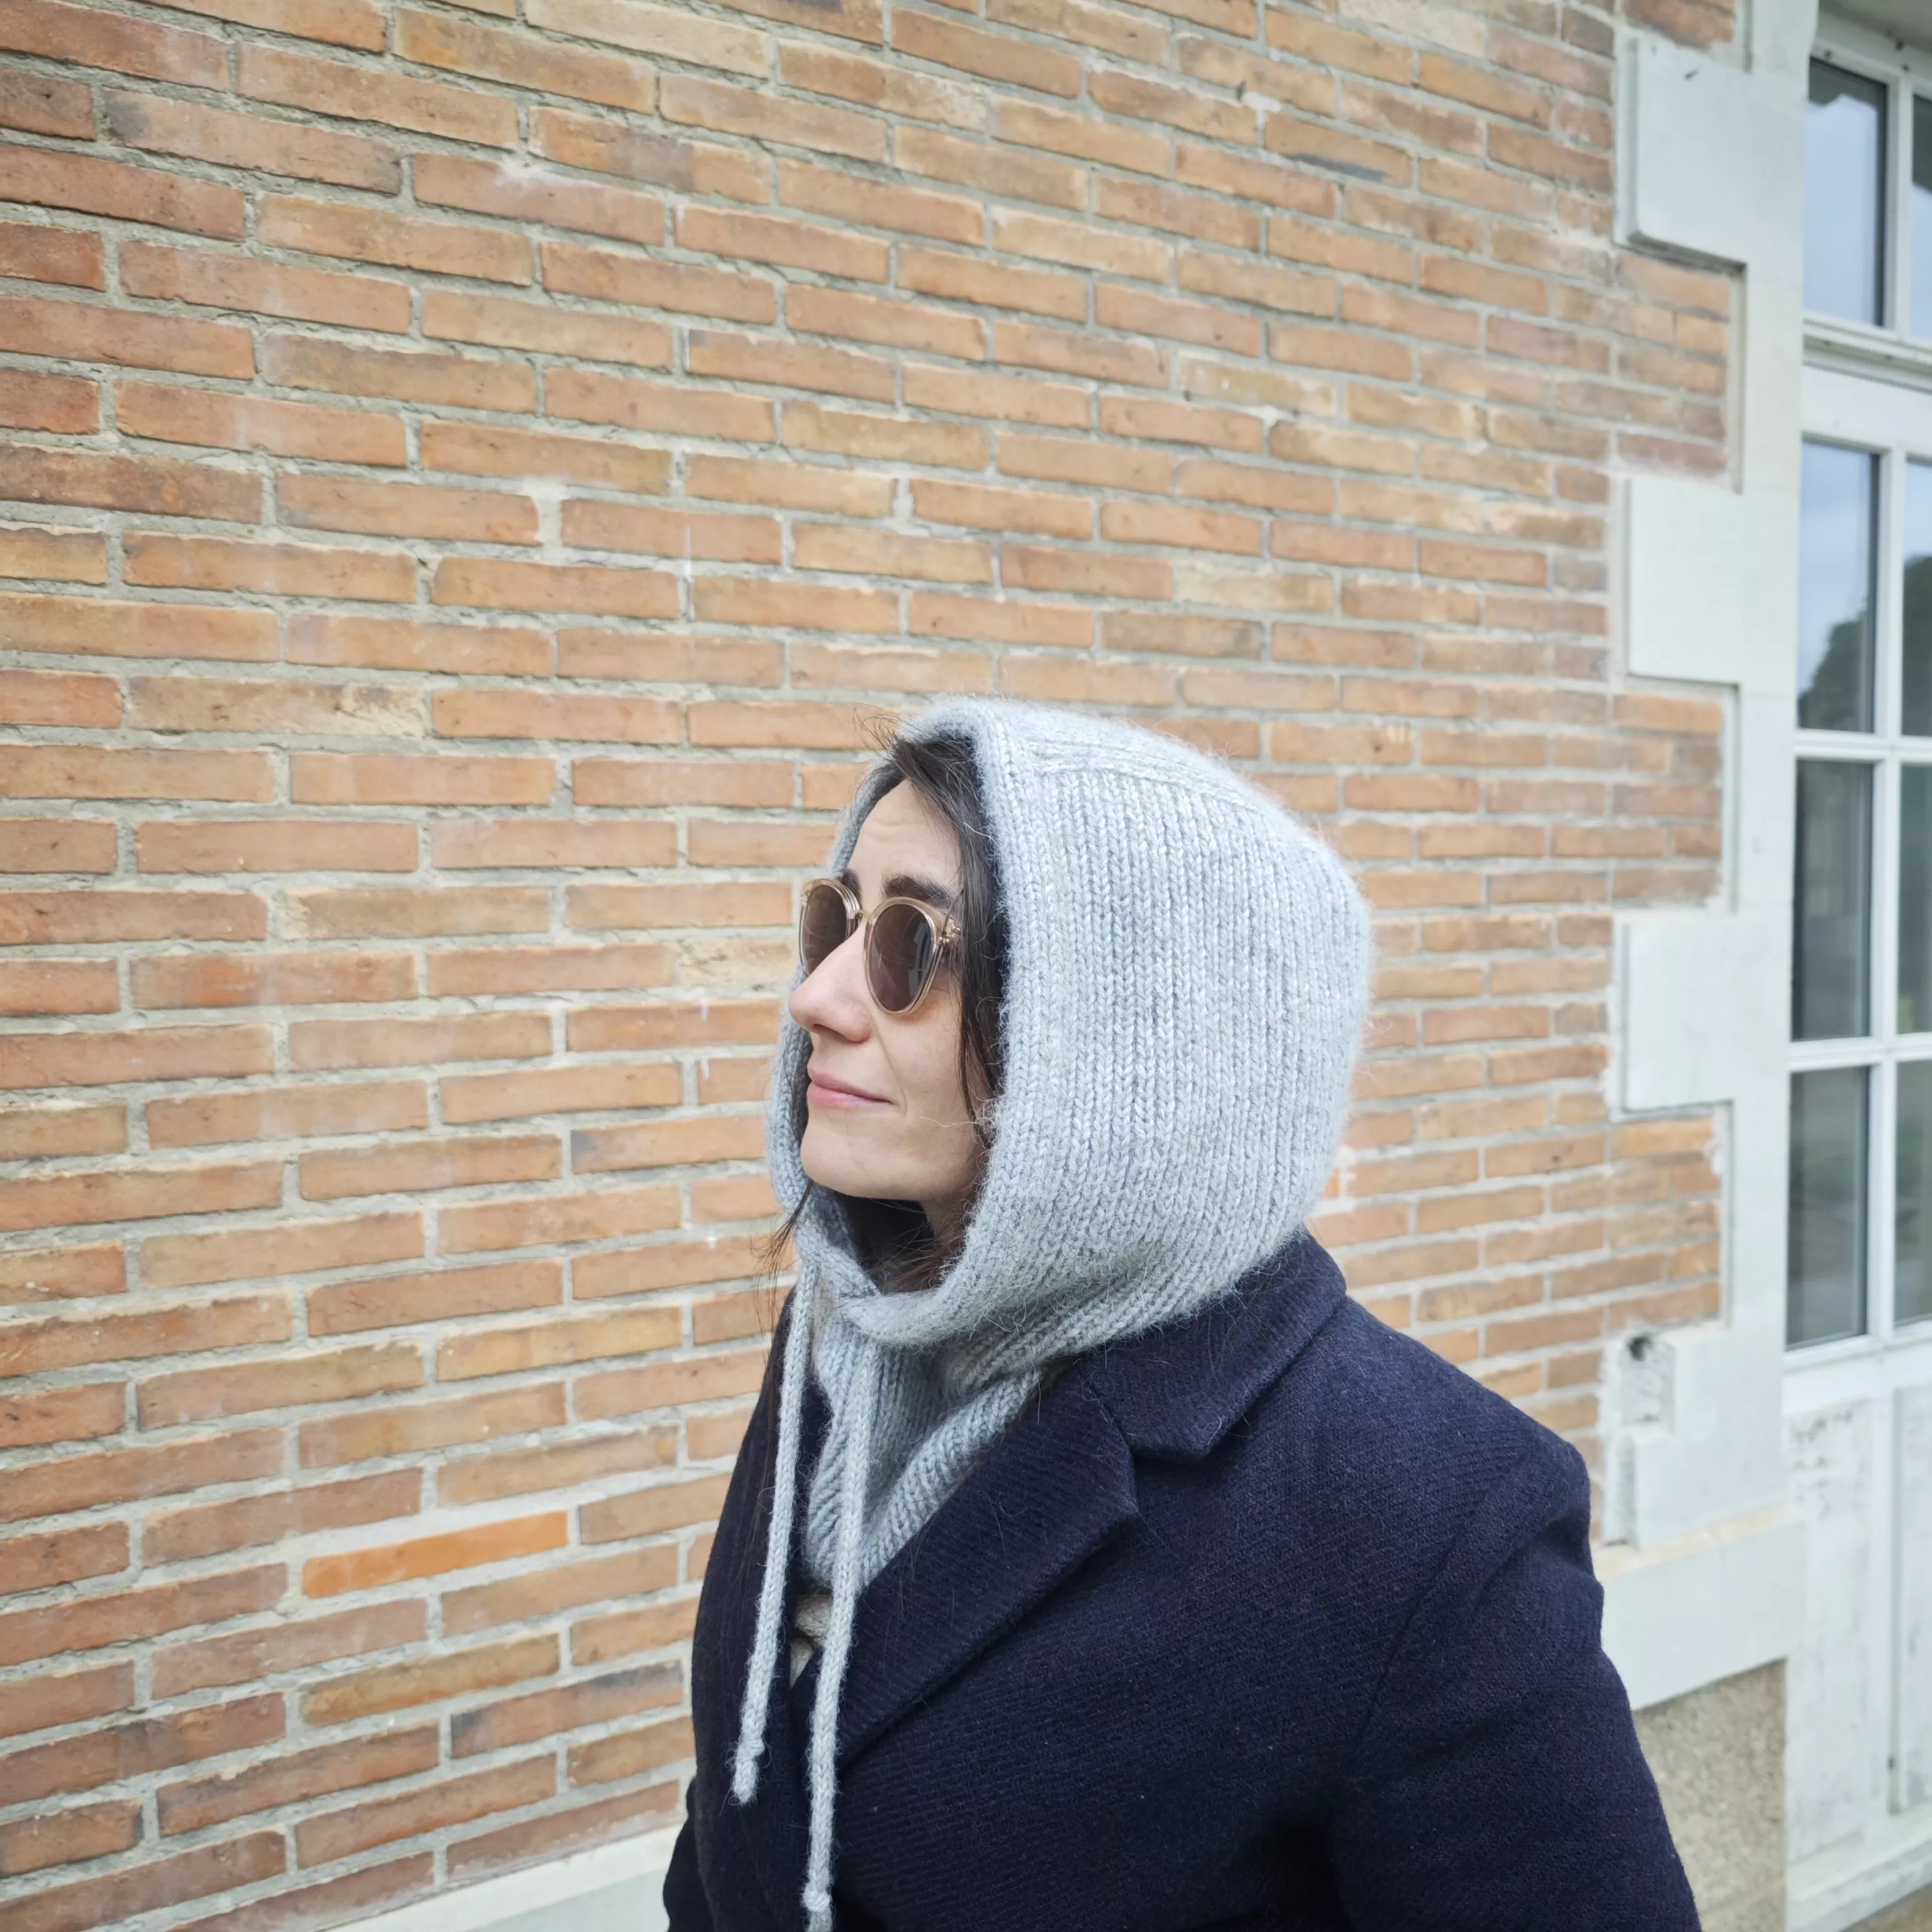
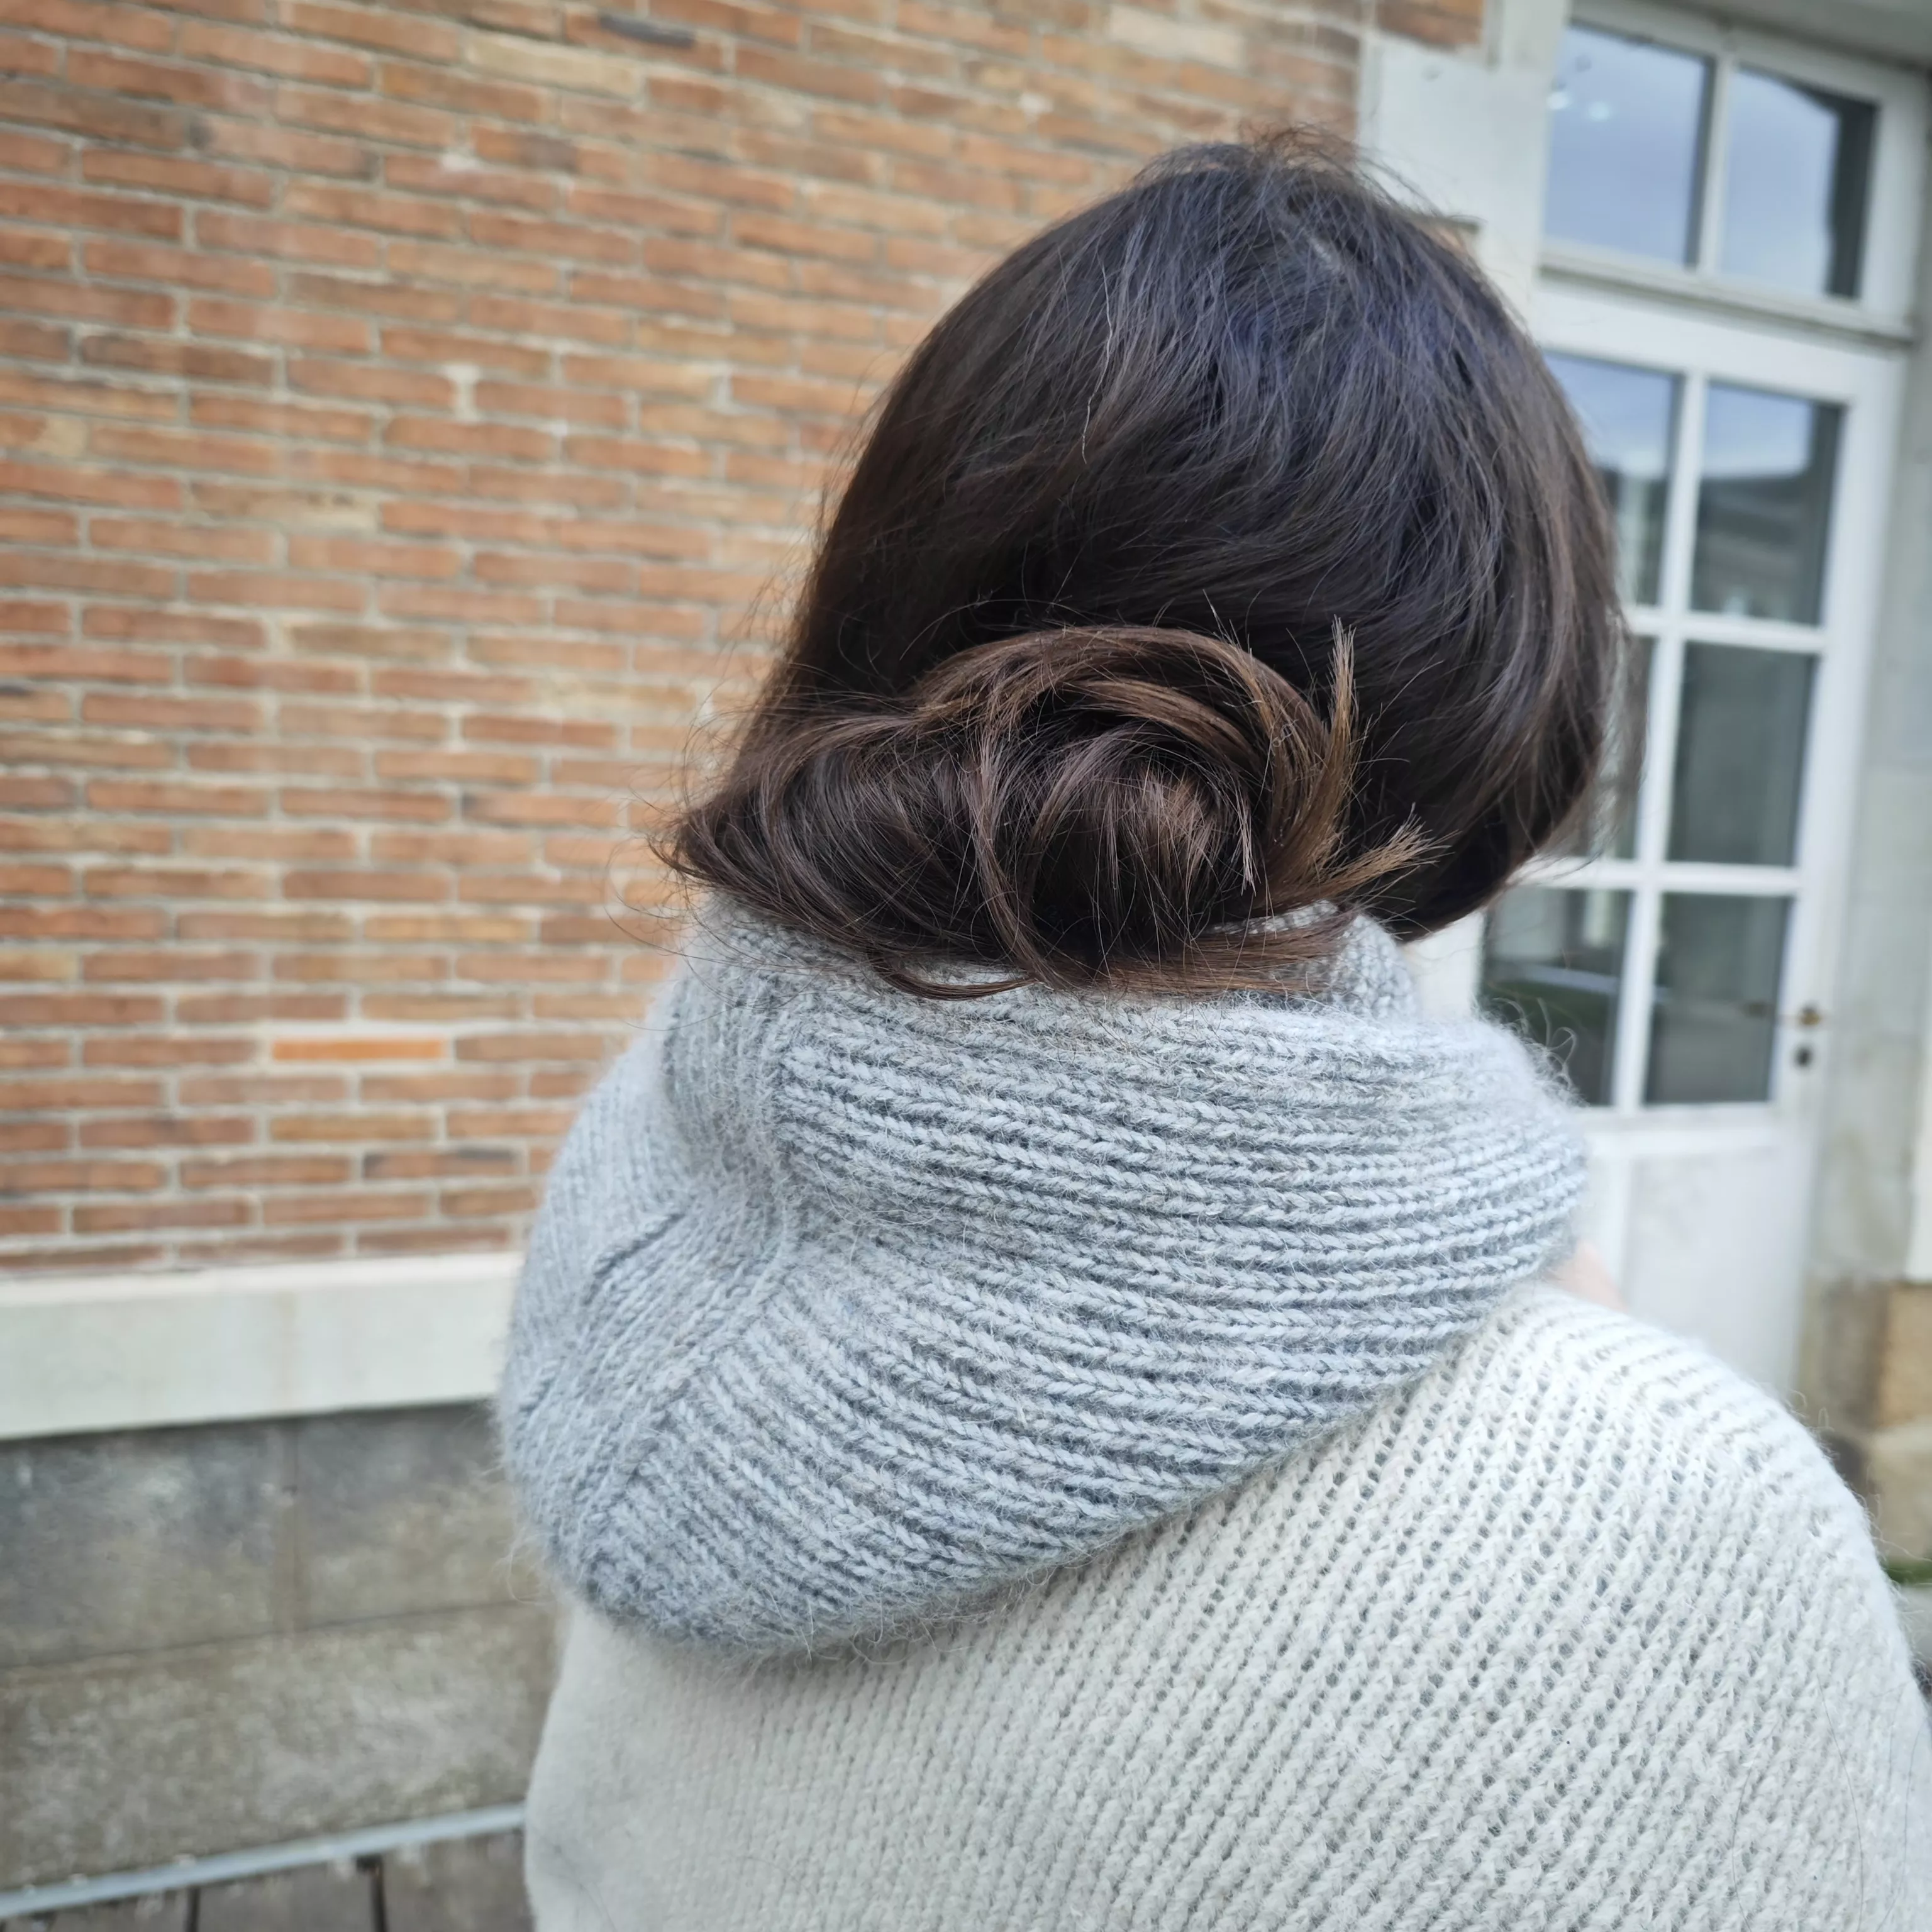
The model is worked in 1/1 rib from bottom to top, with an integrated hem around the face.
Material: 420m/460 yards of sport-weight merino and the same amount of Brushed Alpaca Silk. For substitution, I recommend choosing a main yarn with structure, such as alpaca, and a soft, fluffy yarn like mohair.
Needles: Circular and double-pointed needles 4mm/US6 or equivalent to achieve gauge, and double-pointed needles 3.5mm/US4.
Gauge (10x10 cm or 4x4 in): 21 stitches × 25 rows in 1/1 rib.
Finished dimensions: 51cm/20in in height and 29cm/11.4in in width.
Also the YouTube Tutorial is available here: https://youtu.be/ipq98_lkRh8
The Instructions For The Model
Don't forget that if you encounter any difficulties, the pattern is available as a video tutorial on my YouTube channel, Terrifiknits!
- Cast on 124 stitches using 4mm/US6 needles.
- Place a marker and join in the round.
- Knit in the round for 15 cm/6 in in 1/1 rib, starting with a purl stitch.
- On the next round, bind off the first 3 stitches and continue in 1/1 rib: 121 stitches remain.
- Work back and forth for 60 rows or 22 cm/8.7 in from the start of flat knitting.
- On the next row (right-side), place two markers to define the central flap: 54 stitches (right side), marker, 13 stitches (flap), marker, 54 stitches (left side).
- Then, start the hood shaping decreases:
- [Knit in 1/1 rib until 2 stitches before the first marker, knit the next two stitches together through the back loop, slip the marker, knit the 13 flap stitches in 1/1 rib, slip the marker, slip the next stitch, knit the following stitch, pass the slipped stitch over the knit stitch and slip it onto the right needle, then continue in 1/1 rib: 119 stitches remain: 53 stitches for each side and 13 stitches for the flap.
- On the next row (wrong-side), work stitches as they appear.
- On the next row(right-side), knit in 1/1 rib until 2 stitches before the first marker, purl the next two stitches together, slip the marker, knit the 13 flap stitches in 1/1 rib, slip the marker, slip the next stitch, purl the following stitch, pass the slipped stitch over the purled stitch and slip it onto the right needle, then continue in 1/1 rib : 117 stitches remain: 52 stitches for each side and 13 stitches for the flap.
- On the next row (wrong-side), work stitches as they appear.]
- Repeat from [ to ]3 more times: 109 stitches remain, with 48 stitches for each side and 13 stitches for the flap.
- [ On the next row (right-side), knit in 1/1 rib until 3 stitches before the first marker, purl the next three stitches together through the back loop, slip the marker, knit the 13 flap stitches in 1/1 rib, slip the marker, slip the next stitch, purl the next two stitches together, pass these two stitches back onto the left needle, then pass the knitted stitch over the first and slip it onto the right needle, continue in 1/1 rib : 105 stitches remain: 46 stitches for each side and 13 stitches for the flap.
- On the next row (wrong-side), work stitches as they appear.]
- Repeat from [ to ]3 more times: 97 stitches remain, with 42 stitches for each side and 13 stitches for the flap.
- On the next row (right-side), start shaping the top of the hood: knit in 1/1 rib until the stitch before the second marker. Knit the last stitch together through the back loop with the stitch that follows. Turn the work, leaving the remaining stitches on hold on the left needle.
- [ On the next row (wrong-side), pick up one stitch from the held stitches and purl it through the back loop with the first flap stitch. Continue in 1/1 rib until the stitch before the next marker. Purl it together with the stitch after the marker. Turn the work, leaving the remaining stitches on hold.
- On the next row (right-side), pick up one stitch from the held stitches and knit it together with the first flap stitch. Continue in 1/1 rib until the stitch before the next marker. Knit it through the back loop with the stitch after the marker. Turn the work, leaving the remaining stitches on hold.]
- Repeat from [ to ] until all the held stitches have been worked.
- Leave the 13 flap stitches on hold and cut the yarn, leaving about 10 cm/4 in of tail.
- With 4mm/US6 double-pointed needles, pick up 6 stitches from the bound-off stitches at the base of the face opening with the lose end of the yarn, ensuring that the next row starts from the opening.
- [ On the next row (outer), slip one stitch with the yarn in front, knit one stitch, slip one stitch with the yarn in front, knit one stitch, slip one stitch with the yarn in front, knit the last stitch through the back loop together with a picked-up stitch from the face edge: 6 stitches total, only 3 worked.
- On the next row (inner), slip one stitch with the yarn in front, knit one stitch, slip one stitch with the yarn in front, knit one stitch, slip one stitch with the yarn in front, knit the last stitch: 6 stitches total, only 3 worked.]
- Repeat from [ to ] until all the stitches around the face opening have been worked.
- Bind off stitches, knitting them two at a time and sew them behind the picked-up stitches to secure the contour band.
- Knit a 80cm/31.5in cord by working 4 stitches in the round or in double knitting using 3.5mm/US4 double-pointed needles.
Weave in the ends and block.
And there you have it, your Timber hat is finished! Now, all that's left is to test it out in real-life situations!
Don’t forget to tag me on Instagram, Facebook or Tiktok hashtags #terrifiknits and #tobinBaklava or #CapucheTobin once you're done or add this project to your Ravelry list ! Can't wait to discover your version
What You'll Need:
Knitting pattern : download the instructions by clicking on the button below
Baclava Tobin Terrifiknits (PDF, 503.46 KB)
All my patterns are available for free.
So dont forget to show your support by subscribing to any of my social medias !
You'll help increase the visibility of my work...
You're document will be available in
Your file is availableDownload
Yarn used: Merino Extra Fine and Brushed alpaga silk, light grey (uni color 17 and 35), Drops
https://www.garnstudio.com/yarn.php?show=drops-brushed-alpaca-silk&cid=8
https://www.garnstudio.com/yarn.php?show=drops-merino-extra-fine&cid=8
There is no comment yet.
Add a comment