The Inspiration
You probably often find yourself in the same situation, having a fantastic yarn but not enough of it to make a full project. I'm talking about those skeins you bought on a whim or those significant leftover yarns you might have when you miscalculated for a project.
I treated myself to a wonderful Christmas gift: an advent calendar of hand-dyed skeins from Louve dans les Bois
It brought me so much joy every day in December as I discovered all these beautiful colors, with combinations more intricate than the next.
By treating myself to this gift, I knew I was also heading towards some challenges.
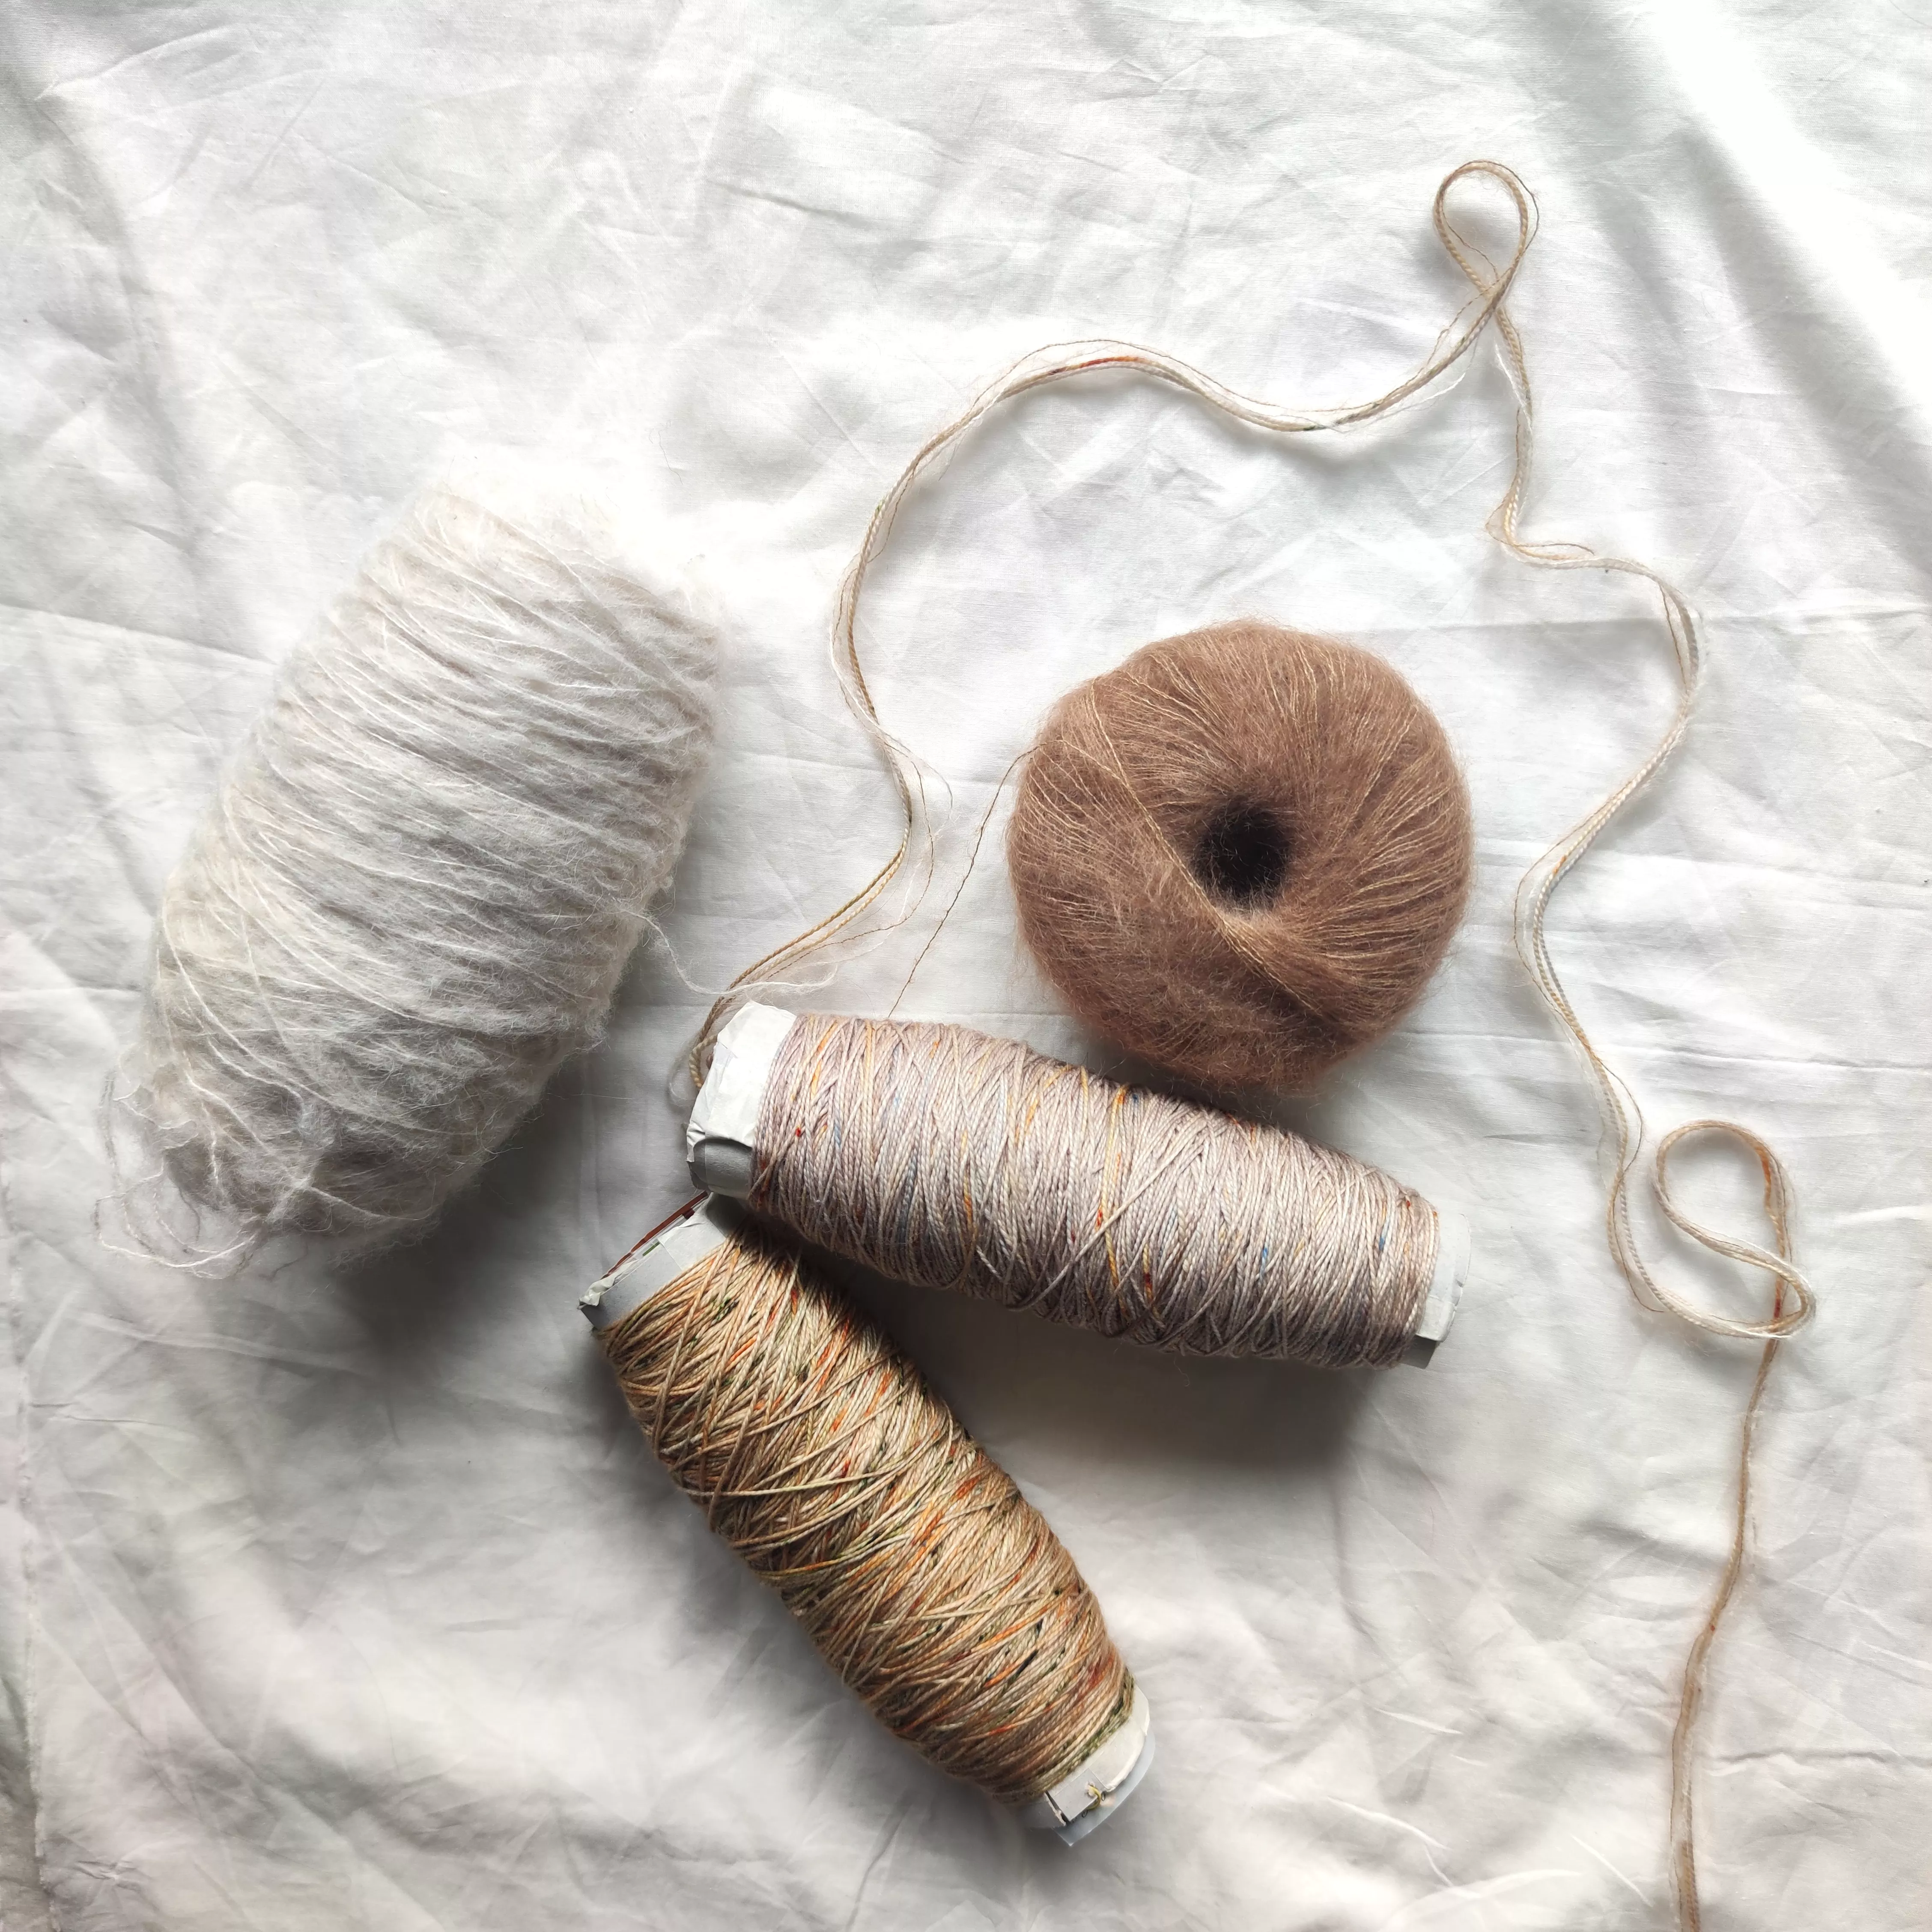
Indeed, I don't like buying yarn without having a project in mind. I tend to accumulate it without using it, which goes against my principles of responsibility and is also a waste of money. So there I was, with nearly 20 skeins of very varied colors to use... Most of them were small ones, about 75m/82yds each, which I would probably end up using in a Fair Isle project. But two of them, beautiful ones, measured 365m/400yds each.
I went in search of projects to use them...
Of course, I looked at accessories that didn't consume much yarn, but I must say I already have a nice stock of hats and others. Since the colors were superb, I wanted to keep them for myself, so no question of making a gift! I needed to innovate!
Considering the colors of the skeins were variations around beige, I thought I could combine them to create a third, even more complex color. With this principle, I could embark on a more lavish project.
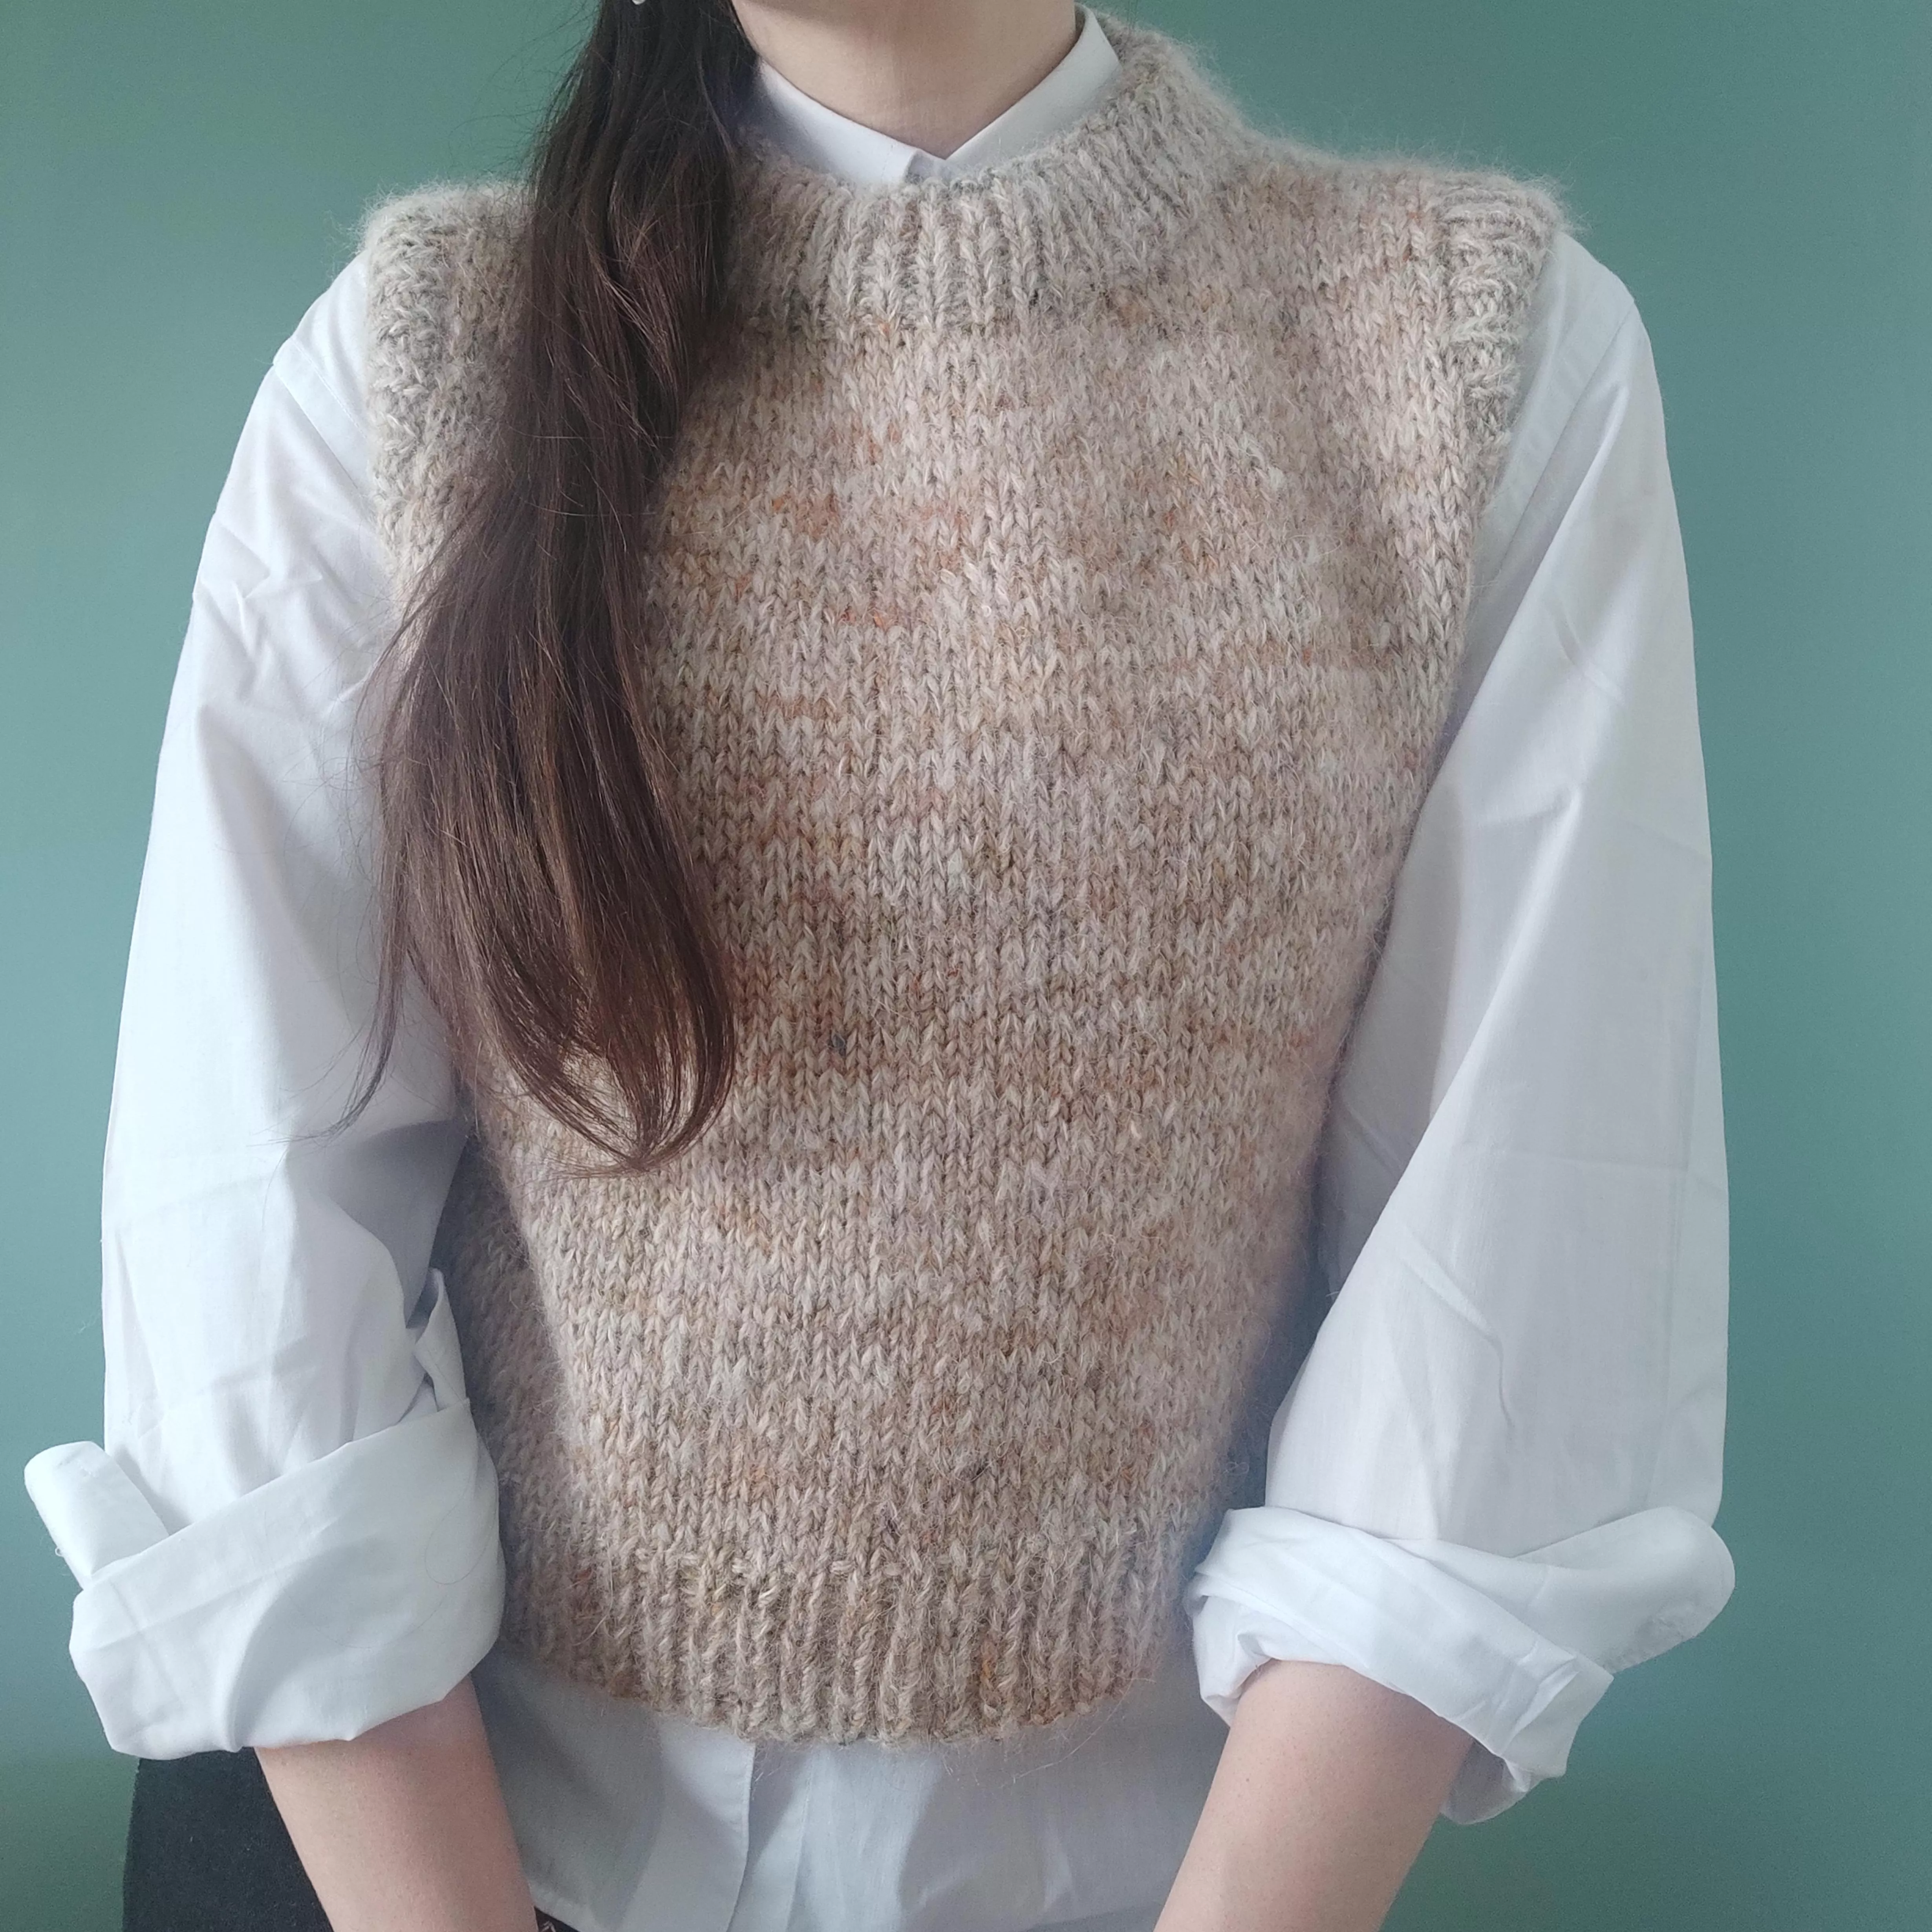
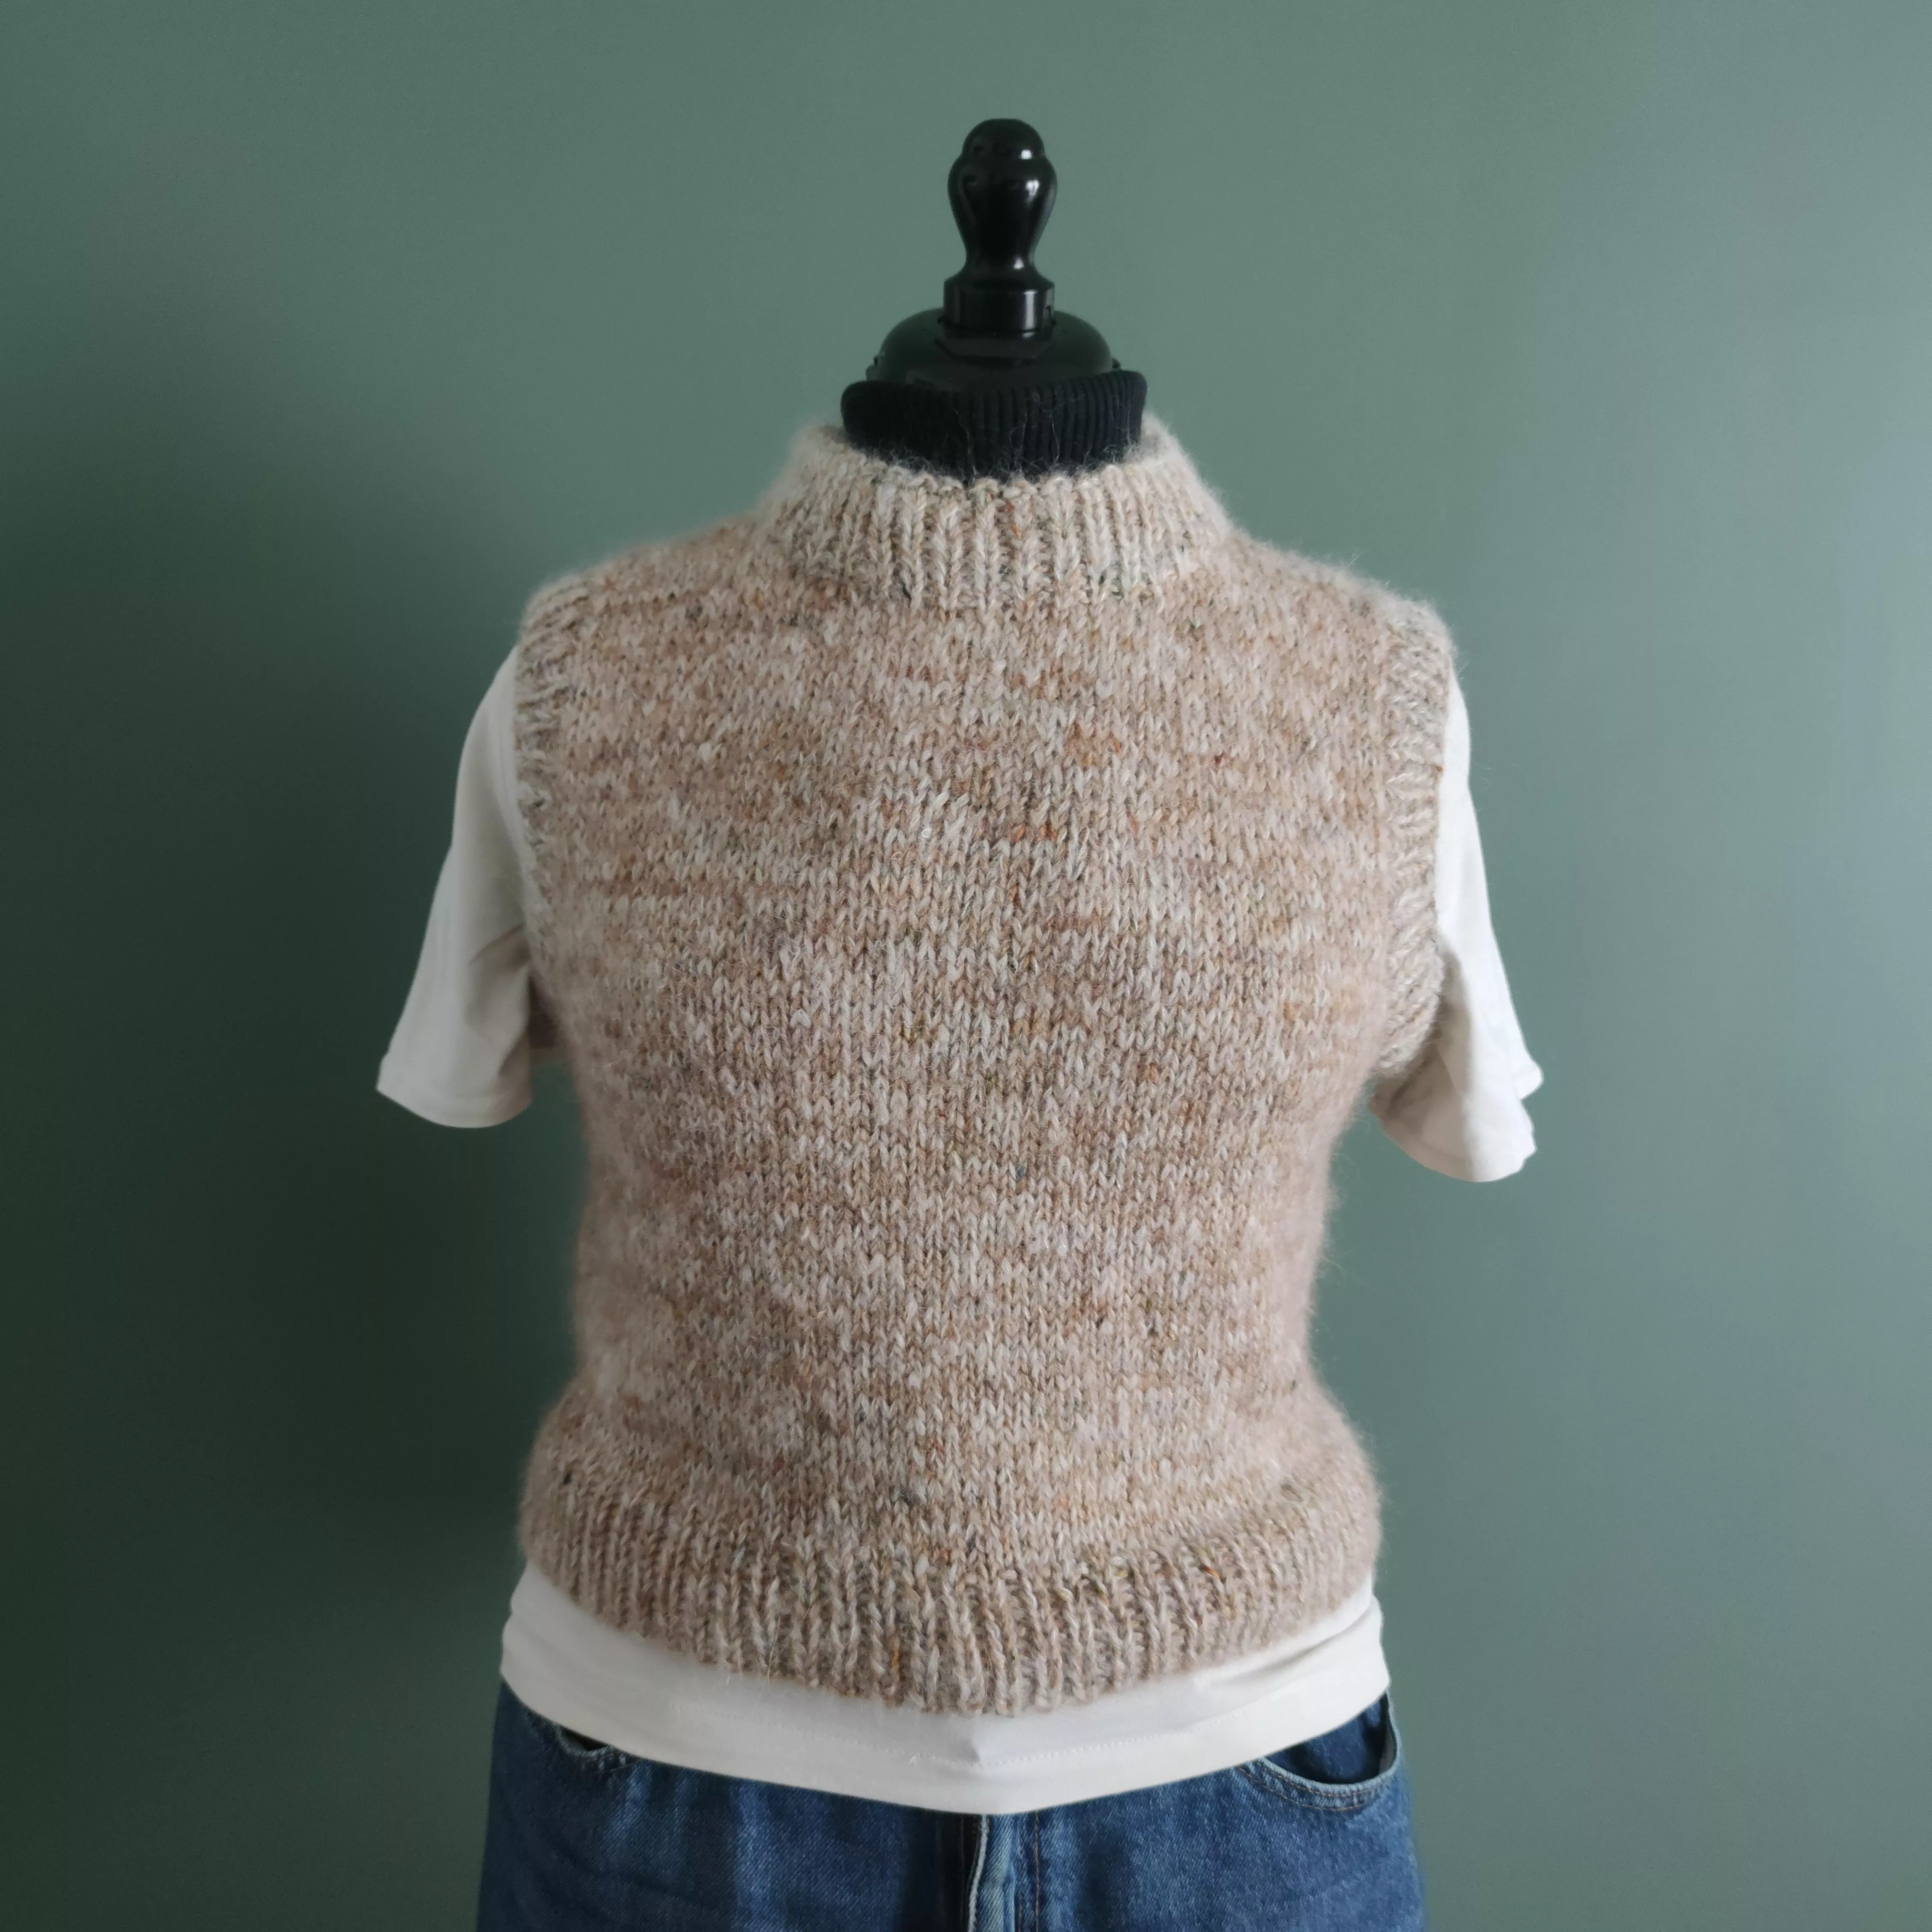
My choice was made: it would be a sleeveless sweater!
I wanted to add softness to the material, some merino. So I delved into my stash to find remnants of mohair and brushed alpaca silk that blend wonderfully with the base color.
As for the pattern I created for the occasion, I'll share it with you below!
Good news too, I made a video tutorial on my YouTube channel to help you make this vest even if you're a beginner :
The Pattern
The model is worked in the round from the bottom up. The armhole edges and the collar are worked in the round from the stitches picked up from the body. The collar is made with an integrated hem and is finished with elastic to maintain the elasticity of the opening. The model is available in S/M/L/XL/XXL/XXXL.
Materials: I made the model shown in the photo using 4 yarns: two strands of Baby Merino, one strand of Brushed Alpaca Silk, and one strand of mohair. For each yarn, I used 300 / 370 / 450 / 550 / 650 / 800 meters or 328 / 405 / 492 / 602 / 711 / 875 yards of yarn. For substitution, I recommend choosing a main material with structure like wool and "cuddle" type secondary yarns.
Needles: Circular and double-pointed needles 6mm/US10 and 5mm/US8 or equivalent to achieve the correct gauge.
Gauge 10X10 cm or 4x4in: 15 stitches X 18 rows.
Finished sizes: see pdf.
The Instructions
Don't forget that if you encounter any difficulties, the pattern is available as a video tutorial on my YouTube channel, Terrifiknits!
THE BODY:
- Cast on 140 / 148 / 160 / 180 / 192 / 204 stitches using 5mm/US8 circular needle.
- Place a marker at the beginning of the round.
- Knit one round in stockinette stitch, then in 1x1 ribbing for 5 cm/2 inches or about 9 rounds.
- Switch to 6mm/US10 needle and continue in stockinette stitch until the body measures 23 / 24 / 25 / 26 / 28 / 30 cm or 9 / 9.5 / 9.8 / 10.2 / 11 / 11.8 in from the bottom.
- Mark the halfway point with another marker =70 / 74 / 80 / 90 / 96 / 102 stitches.
- Bind off 8 / 10 / 10 / 12 / 12 / 14 stitches on each side of each marker, totalling 4 / 5 / 5 / 6 / 6 / 7 stitches before and after each marker.
- Continue working the front and back separately = 62 / 64 / 70 / 78 / 84 / 88 stitches.
THE FRONT:
- Shape armhole curves by decreasing on right side rows:
- 1 / 1 / 1 / 2 / 2 / 2 times 3 stitches.
- 1 / 1 / 3 / 2 / 2 / 2 times 2 stitches.
- 2 / 3 / 2 / 2 / 2 / 3 times 1 stitch.
- You should have 48 / 48 / 48 / 54 / 60 / 62 stitches remaining.
- Continue in stockinette stitch until the piece measures 42 / 44 / 46 / 48 / 50 / 52 cm or 16.5 / 17.3 / 18.1 / 18.9 / 19.7 / 20.5 in from the bottom.
- Prepare the neckline:
- Place the central 16 / 16 / 16 / 16 / 20 / 20 stitches on hold and work the shoulders independently.
- Decrease 1 / 1 / 1 / 1 / 1 / 1 times 3 stitches.
- Decrease 1 / 1 / 1 / 1 / 2 / 2 times 2 stitches.
- Decrease 2 / 2 / 2 / 1 / 1 / 2 times 1 stitch.
Bind off the 9 / 9 / 9 / 10 / 12 / 12 stitches remaining
THE BACK :
- Shape armhole curves by decreasing on right side rows:
- 1 / 1 / 1 / 2 / 2 / 2 times 3 stitches.
- 1 / 1 / 3 / 2 / 2 / 2 times 2 stitches.
- 2 / 3 / 2 / 2 / 2 / 3 times 1 stitch.
- You should have 48 / 48 / 48 / 54 / 60 / 62 stitches remaining.
- Continue in stockinette stitch until the piece measures 45 / 47 / 49 / 51 / 53 / 55 cm or 17.7 / 18.5 / 19.3 / 20.1 / 20.9 / 21.7 in from the bottom.
- Prepare the neckline:
- Place the central 28 / 28 / 28 / 28 / 30 / 30 stitches on hold and work the shoulders independently.
- Decrease 0 / 0 / 0 / 0 / 0 / 1 times 2 stitches.
- Decrease 1 / 1 / 1 / 2 / 3 / 2 times 1 stitch.
- Bind off the 9 / 9 / 9 / 11 / 12 / 12 stitches remaining.
THE ARMHOLES:
- With 5mm/US8 circular needle, pick up 72 / 80 / 86 / 88 / 92 / 96 stitches along the neckline including the stitches on hold for the back and front.
- Place a marker at the beginning of the round.
- Work in 1x1 ribbing for 3 cm or 1.2 inches from the picked-up stitches.
- Bind off.
THE COLLAR :
- Sew the shoulders together.
- With 5mm/US8 circular needle, pick up 76 / 76 / 76 / 76 / 78 / 80 stitches along the collar including the stitches on hold for the back and front.
- Place a marker at the beginning of the round.
- Work in 1x1 ribbing for 4 cm or 1.6 inches from the picked-up stitches.
- Work one round in purl.
- Work in 1x1 ribbing for 4 cm or 1.6 inches from the purl round.
- Bind off loosely.
- Sew the collar to the inside, folding along the purl round.
- Add an elastic thread to reinforce the flexibility of the collar before closing the seam if necessary.
THE FINISHES :
- Weave in ends and block.
There you have it, a gorgeous sleeveless sweater made by yourself! Perfect for keeping warm in style!
Don't forget to tag me on Instagram, Facebook, or TikTok with the hashtags #terrifiknits and #TrentoVest or #PullTrento once you're done, or add this project to your Ravelry list! I can't wait to see your version!
What you'll need :
Knitting pattern : download the instructions by clicking on the button below
Trento Vest Terrifiknits (PDF, 621.72 KB)
All my patterns are available for free.
So dont forget to show your support by subscribing to any of my social medias !
You'll help increase the visibility of my work...
You're document will be available in
Your file is availableDownload
Yarn used : Lo(u)ve Twist Sock coloris Admont Abbey Library and Orgues de l'Ille sur Têt, Kidsilk Almond (Uni colour 42) and Brushed Alpaca Silk natural (uni colour 01) from Drops
https://www.unelouvedanslesbois.com/louve-twist-sock/
https://www.garnstudio.com/yarn.php?show=drops-brushed-alpaca-silk&cid=8
https://www.garnstudio.com/yarn.php?show=drops-kid-silk&cid=8
There is no comment yet.
Add a comment